
[ HG ] Simple setup guide
Set up PhotoBrief without overthinking it.
Build one useful template, send one test request, then put the branded PhotoBrief.ai badge on your website so customers understand why the guided photo request helps them.
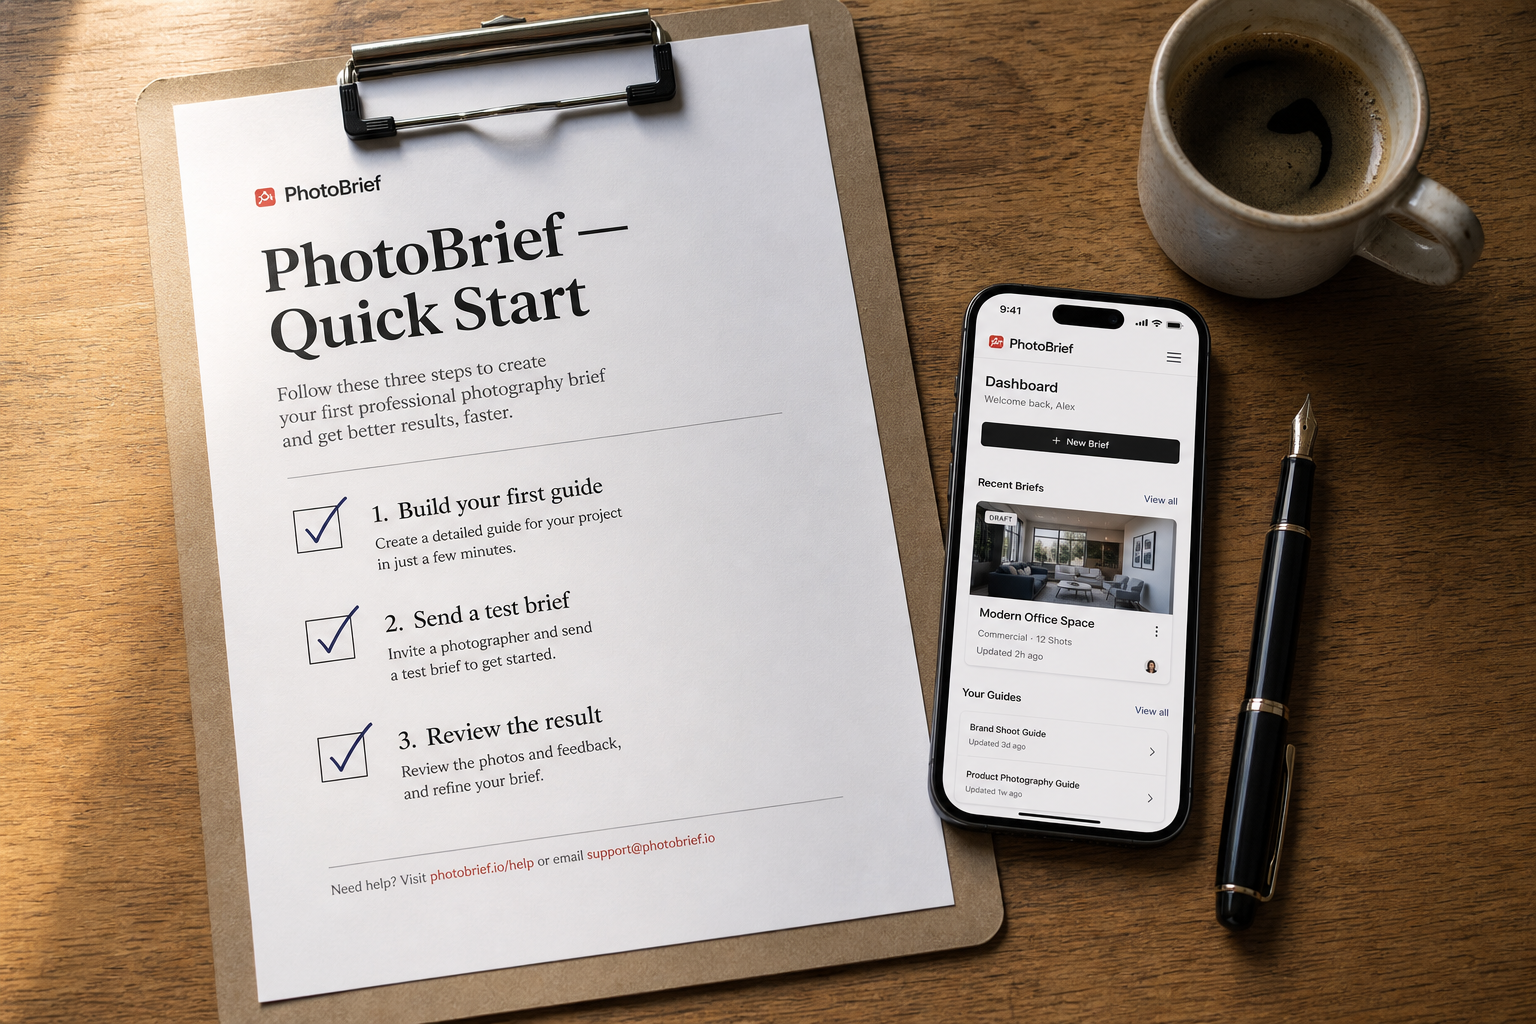
[ Photo 01 ]
The shortest path still fits on one page: build a guide, send a test brief, review the result.
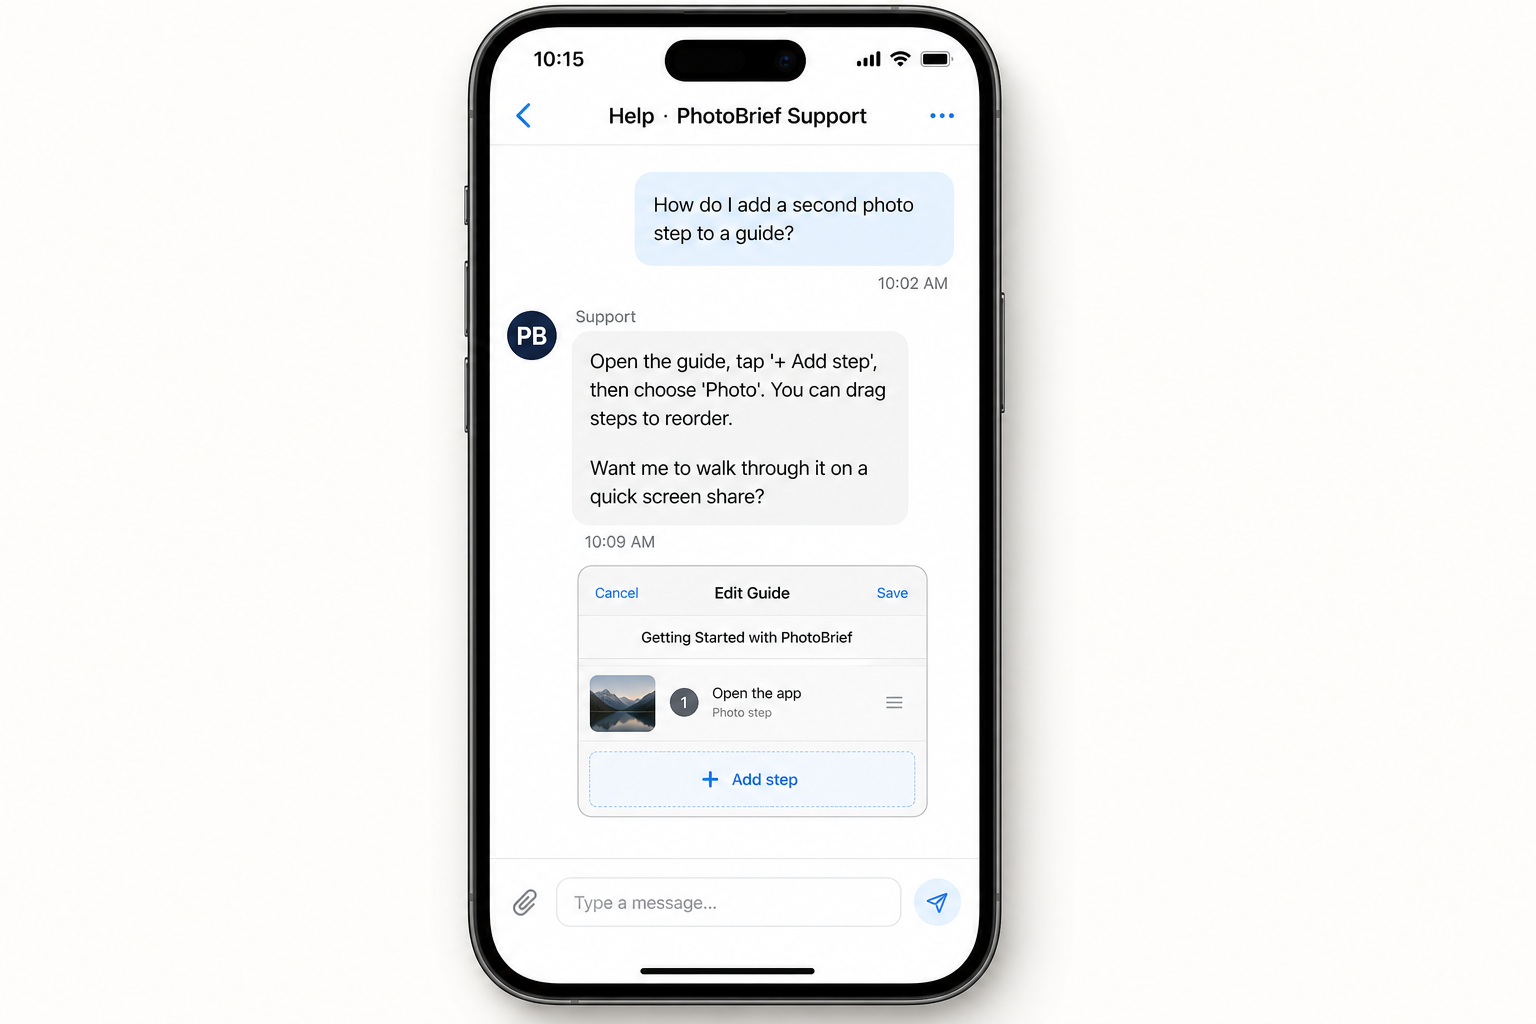
[ Photo 02 ]
When somebody gets stuck, the answer lives inside the product with the exact next step.
Quick start
The shortest path: create one request, send it to yourself, and review the result.
Do these first
0 / 51
Create a photo request
Open Requests → New request. Start with AI, choose a saved template, or tap Start blank. The goal is simple: tell the customer exactly what photos you need.

1
2
3
- 1.Build with AI, use a saved template, or start blank
- 2.Answer a few simple setup questions
- 3.Review the request before sending
What you should see
A simple setup card on the left and an editable request preview on the right.
2
Tell AI the essentials
If you use AI, answer the short setup questions: what the request is for, how many photos you want, any must-have photos, and any questions the customer must answer.
Quick tip
Keep it boring. Two to five photos and one or two questions is usually enough.
3
Check the photos and questions
Review the generated draft. Each photo step should be clear enough that a customer can do it without calling you. Edit the wording, remove anything extra, then add the customer’s name and email or phone.
4
Create the request
Tap Create request. PhotoBrief creates a secure link and emails it automatically when an email is available. You can also copy the link from the request page.
What you should see
A confirmation toast, then the request detail page.
5
Review the finished brief
When the customer finishes, open the request. You’ll see the photos, simple AI notes, any answers, and a summary. Accept it or ask only for the specific retakes you need.
Quick tip
Follow-up retakes are built for first-pass cleanup, not making the customer redo everything.
Ready to build your first request?
Open New request